Sometimes it is advantageous to add a delay in between workflow steps. This helps to stagger workflow steps and creates a more natural experience for recipients.
The Delay Step allows you to define when the next step in the workflow will execute.
Delay Step Requirements:
- Delay Steps cannot be placed before a Survey Listener or Share Link initiator.
- A Delay Step cannot be the last step in a workflow.
- You cannot have two Delay Steps back-to-back.
- Units of time must be positive whole integers (Ex. cannot be 1.5). Minimum delay is one minute and maximum delay is one year.
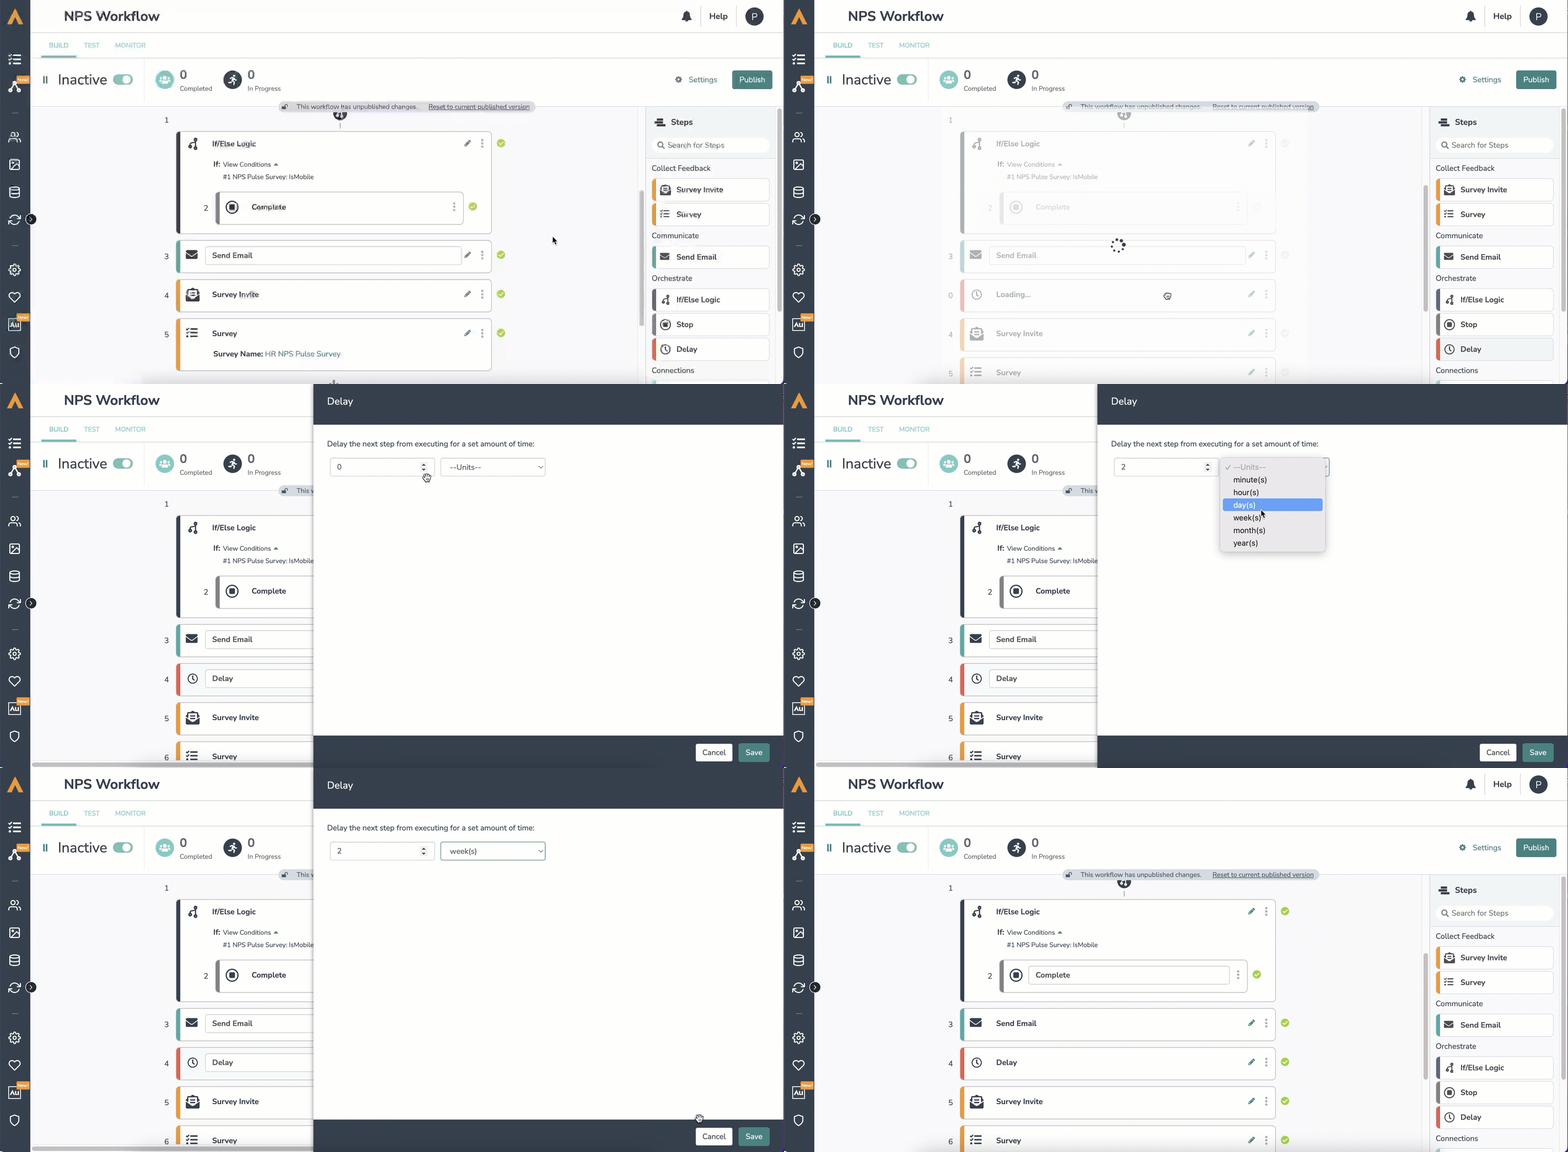
Follow these steps to add and edit Delay Steps:
- Drag a Delay step from the Step list, on the right side of the screen, onto your workflow timeline.

- Click on the pencil icon to edit the Delay Step.
- Define the time value that you would like to delay the next step by.
- Define the unit of time: minutes, hours, days, weeks, months, years.
Workflow steps set to send "x" days after last step are not precise down to the timestamp of the previous send. It will be added to a queue after the initial send.
How do test runs work with the Delay Step?
- Within the Test Tab, toggle yes/no to run or not run the Delay step.
- If you toggle “yes” to run the Delay Step, the test run will default to one minute.
- If you toggle “no” and don’t run the delay step, there won’t be a step delay.
